Red hot on the heels of Kotobukiya's Second Armor kit, the re-issue of Zero is now available! How does this kit stack up to the rest of Koto offerings? Is this kit worthy of representing the legendary red Maverick Hunter? Find out after the break!
Review sample provided by HobbyLink Japan. Go check 'em out!
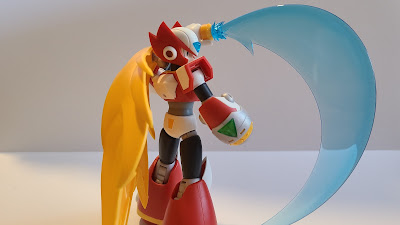
As usual with Kotobukiya's Mega Man X line, Zero looks as if he has jumped straight from the games and promo art and straight to your shelf. On top of looking great, Zero's articulation is fantastic. Thanks to the the updated arm style that X's Force Armor and Second Armor used, placing Zero in more complicated poses is easy. So grab your Z-Saber and get ready to bust some Mavericks!
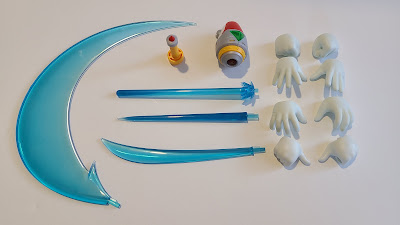
Speaking of the Z-Saber, this is a good time to talk about the accessories. Zero comes with three faces: neutral, teeth gritting, and shouting. As usual with these kits, there's a variety of hand parts. He also comes with a Z-Buster, the more well-known "X3" variety to be exact. And last but not least, there's the trademark Z-Saber with not one, but four different blade types! The variety of the transparent blue blades gives you several posing options. I'm sure you'll be able to come up with something fun and striking!
Now, I'd like want to get my gripes with this kit out of the way so I can spend the rest of this article delivering the praise it deserves.
First of all, changing the faces is a real pain -- literally! Unlike the X kits, you need to take apart Zero's helmet in order to change out his faces. Given how sharp the helmet is by design and how tight the connection is, you really need to be careful not to poke yourself. I found it very difficult to change the face the first time. But one or two times again, it was much easier.
I recommend placing Zero's head in warm water before changing his face the first time. The warm water will help the connection come apart easier. I've also heard that some people had issue with the feet not having a solid connection. This hasn't been an issue with my kit, even after several poses. Lastly, I've seen photos of this kit where the white part on the helmet was not pushed in all the way. It gets tough, but looks way better when it's on properly.


Yea I had problems with the feat on my Nightmare Zero. Ended up 3d printing alternate ball sockets to make it working. They are hidden, so it works out.
ReplyDeleteWould you mind posting the print for the ball joint you made? I would love to have working feet on mine.
DeleteI'll look into how difficult it is to load onto thingiverse.
DeleteI can't guarantee it will work for you. I made several versions to get the fit right using my printer. Some modification might be required for general distribution.
Try this. The file was made in Google Sketchup. It's free, and pretty easy to use.
Deletehttps://3dwarehouse.sketchup.com/model/26815b1d-96cb-43dd-b318-2673e1351e6a/Rockman-Zero-Kotobukiya-Custom-Ankle-Joint
I think the issue people had with the feet is due to the fact that the ball which goes into the foot and the ball which goes into the leg look the same, but they are actually ever-so-slightly different sizes. If super close attention was not payed to the instructions, and that joint was installed backwards: that foot is (or both feet will be) loose. This is why some people have loose feet, and others don't: assembly error. You'd have to use calipers to tell the difference between those two ball-ends of the ankle joint, as it's hard to tell by eye.
ReplyDeleteIt's also just not a great mechanical design overall. Those circular cut-outs you can see through the clear parts which accommodate the ball are also ugly. (I covered the back of my clear parts with foil tape, and they look great.)
It's the design. I just checked my Zero and its right, the foot easily pops off. Luckily I can get that one to stick. Nightmare Zero's are correct too, buy they never worked.
DeleteI'm waiting my X2 and Zero since a while so it's really cool to see this review, this Zero MK is awesome.
ReplyDelete